
Imagine this: you’re diligently troubleshooting your circuit board when, out of nowhere, it stops working. This situation is all too common and is often caused by a broken or damaged connection on the printed circuit board.
So, what’s the solution?
You don’t have to rush out and buy a new circuit board. Instead, you can quickly re-solder the wires for the PCB and the LED, saving yourself unnecessary expenses. However, you’ll need to know how to properly re-solder the wires onto the board.
Don’t worry; the process is not complicated. We’ll guide you step-by-step on how to use a soldering iron to re-solder the circuit board wires without needing solder. Just follow our instructions, and you’ll be able to restore the board’s functionality and get back to your projects.
Let’s dive in and master this practical skill, so you can confidently tackle your electronic projects!
How to Re-Solder Wires to a Circuit Board

Before we delve into the details, let’s go over some essential tips for re-soldering wires on a circuit board. This process is quite similar to what you already know about soldering wires onto a PCB, so you shouldn’t face too many challenges. However, if you need a refresher on the soldering process, we’ll walk you through it step-by-step.
What You’ll Need:
- Solder: This is a fundamental requirement for the re-soldering process. Solder comes in various thicknesses, starting from around 0.02 mm. For larger projects, thicker solder is often used, particularly with copper pipes or PCBA. However, for detailed work and repairs, it’s advisable to opt for thinner solder.
- Soldering Iron: A high-quality soldering iron is essential for achieving the right soldering temperature. You can choose between low-power (15-40W) and high-power (60-140W) options. Low-power soldering irons are suitable for circuit boards, while high-power ones are better for connecting thicker wires, such as speaker cables.
Once you have your materials ready, you can begin the successful process of soldering wire or soldering wire to the PCB pads. Here’s how to proceed:
Step 1: Preparation
Using a soldering iron can be hazardous, as its temperature can reach up to 800°F. Therefore, it’s crucial to equip yourself with the proper safety gear. Even while wearing gloves, avoid touching the tip of the soldering iron to prevent accidents.
Effective re-soldering hinges on thorough preparation. Start by meticulously examining and systematically restoring the original arrangement of the wires. This step goes beyond mere surface connections; it requires precision, attention to detail, and serves as the foundation for a successful soldering process.
Carefully inspect the circuit board, paying close attention to any damaged or broken wire sections. Having a clear mental map of the wire condition—knowledge is power—will position you favorably for the subsequent steps.
Step 2: Wire Repositioning and Preparation
Now it’s time to address the broken connections. As the soldering iron heats up, focus on the damaged wire ends. Gently twist them together until they reconnect. This is a delicate process; you’re not tying shoelaces, but rather carefully re-establishing vital connections in a complex electrical system.
Once the broken wires are twisted together, it’s essential to temporarily secure them. This is where a plastic stick comes in handy. Use it to hold the twisted section in place, ensuring that the wires remain in contact. This step minimizes the risk of disconnection during the soldering process, making for a more stable and reliable reconnection.
As the soldering iron reaches its operating temperature, cautiously bring its tip close to the twisted wire. The iron should make contact with the wires long enough to heat them without melting. Maintain stability in this section; start with about 2 seconds of heating, extending up to a maximum of 10 seconds.
If you notice any unwanted melting of the wires, quickly retract the soldering iron to allow everything to cool down. In such cases, you may need to try again. Remember, re-soldering requires patience and perseverance.
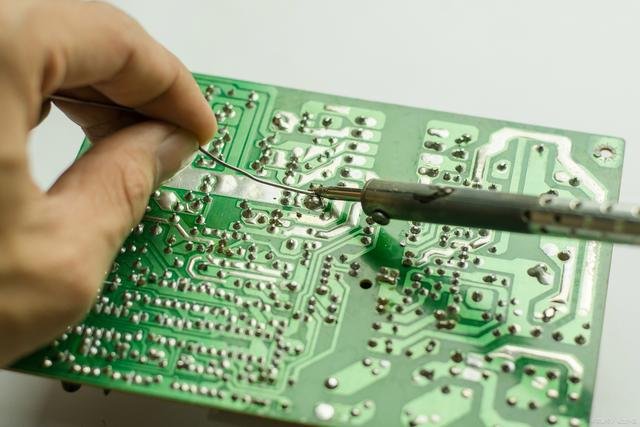
Step 3: Applying Solder
Once the wires are adequately heated—often indicated by a small amount of smoke—it’s time to apply solder. Bring the solder into contact with the heated wires, allowing it to flow into the joint. Maintain this contact until the re-soldering appears complete, but take your time. Your objective is to achieve a solid, robust connection that won’t fail again.
The final step is to remove any excess solder once the circuit board has cooled. While it’s easy to assume that your first attempt will be successful, this isn’t always the case. Don’t be discouraged; you can retry without damaging the circuit board.
Step 4: Soldering the LED
With a solid grasp on how to solder and re-solder wires on a circuit board, you’re ready to tackle the next challenge: soldering an LED onto the board. For this, a temperature-adjustable soldering iron is essential, and a smaller tip size is preferable.
Once you have your LED and circuit board prepared, heat the soldering iron to 675°F. Position the circuit board on a pair of alligator clips to avoid direct contact. Use the heated tip to ensure that both the LED and the circuit board reach the desired temperature.
After adequately heating both components, create a small gap between the metal pad and the LED lead. Wait for two to four seconds, then apply solder into the gap. Once the solder melts and fills the area, you can safely remove both the soldering iron and the solder itself.
Soldering an LED to a circuit board is straightforward when you know the correct techniques. With practice and attention to detail, you’ll achieve reliable and effective connections every time.
How to Connect Wires to a Circuit Board Without Soldering
If you find yourself without a soldering iron or soldering gun at home, there are several effective methods to connect wires to a circuit board without the need for solder. These techniques are cost-effective and simple, making them suitable for quick repairs or temporary connections.
Method 1: Using Alligator Clips
Alligator clips are inexpensive and readily available at hardware or electronics stores. To use this method, start by stripping the insulation off the ends of the wires you wish to connect. Once stripped, position the bare wire ends parallel to each other.
Next, use the alligator clips to secure the wires together. This method allows for quick and easy connections but is best suited for temporary solutions. It’s important to note that connections made with alligator clips can be somewhat weak and may lead to loose joints over time. Therefore, if you need a more robust and permanent connection, consider exploring alternative methods.
Method 2: Using Electrical Tape
Electrical tape is another affordable and efficient option for connecting wires on a circuit board. Easily found at local hardware stores, it provides a reliable way to secure connections.
To connect wires using electrical tape, first twist the stripped ends of the wires together firmly. Once they are tightly connected, wrap the joint securely with electrical tape. This method not only creates a reliable electrical connection but also serves as insulation to ensure safety.
For a more permanent solution, you might also consider using crimping tools or a hot glue gun. Crimping tools can secure the wires together mechanically, creating a strong bond that won’t easily break. A hot glue gun can be used to encase the connection, adding an extra layer of protection against physical stress and environmental factors.
Additional Tips
- Test Connections: After making connections with either alligator clips or electrical tape, it’s crucial to test the circuit for continuity to ensure that the connection is secure and functioning as intended.
- Choose Quality Materials: Opt for high-quality electrical tape and alligator clips to enhance the reliability of your connections. Cheap materials may degrade quickly and lead to failures.
- Future Considerations: While these methods can serve well in a pinch, investing in a soldering iron for future repairs may be worthwhile. Soldering provides a more durable and long-lasting connection, especially for intricate electronic projects.
By utilizing these techniques, you can effectively connect wires to a circuit board without soldering, ensuring that you can perform repairs or modifications quickly and efficiently.
Conclusion
Understanding how to reattach wires to a circuit board can save you considerable amounts of money and extend the lifespan of your devices. By mastering the techniques outlined in this guide for effectively reconnecting damaged wires, you can ensure your electronic equipment remains functional and reliable.
In addition to traditional soldering methods, we have also highlighted alternative approaches for connecting wires without solder. These methods offer practical solutions for quick repairs and can be especially useful in situations where tools are limited or immediate action is required.
By equipping yourself with this knowledge, you not only enhance your repair skills but also gain the ability to troubleshoot and maintain your devices more effectively. Whether you choose to solder or opt for no-solder techniques, being proactive in addressing wiring issues can lead to improved performance and longevity of your electronics.
